Let's Get Crafty with our D.I.Y. Shell Lamp! 🐚

Posted by jaclyn browne on

DIY with Franki  With so many of us currently in lock down we’re spending more time than ever at home, transforming our homes into our sanctuaries. But how do we get those beautiful décor pieces we see on Pinterest to create our sanctuaries on a budget? A little glow up of course, and we’ve got a bright idea for you!   What you need:  Old lamp Tile grout Lengths of dowel (I used 1.8mm Tasmanian oak) Paper raffia twine Sea shells, pebbles, sea glass or any other little trinkets you may have collected Hot melt glue gun Bucket and something to stir with 180 grit sand paper Small hand saw Rubber gloves (If you wish to use your hands)  *If you are currently in lockdown most of these items can be ordered online from your local hardware or craft store.  You may even have an old lamp lying around at home.
Franki’s Tips  When collecting sea shells think about what colour palette you would like to use and get a range of sizes and shapes.  Broken and irregular shells are just (if not more) interesting as whole shell  Ask a friend, family member or neighbour to borrow tools (such as saw) if you don’t already own one Always wear a face mask when sanding or handling grout powder.
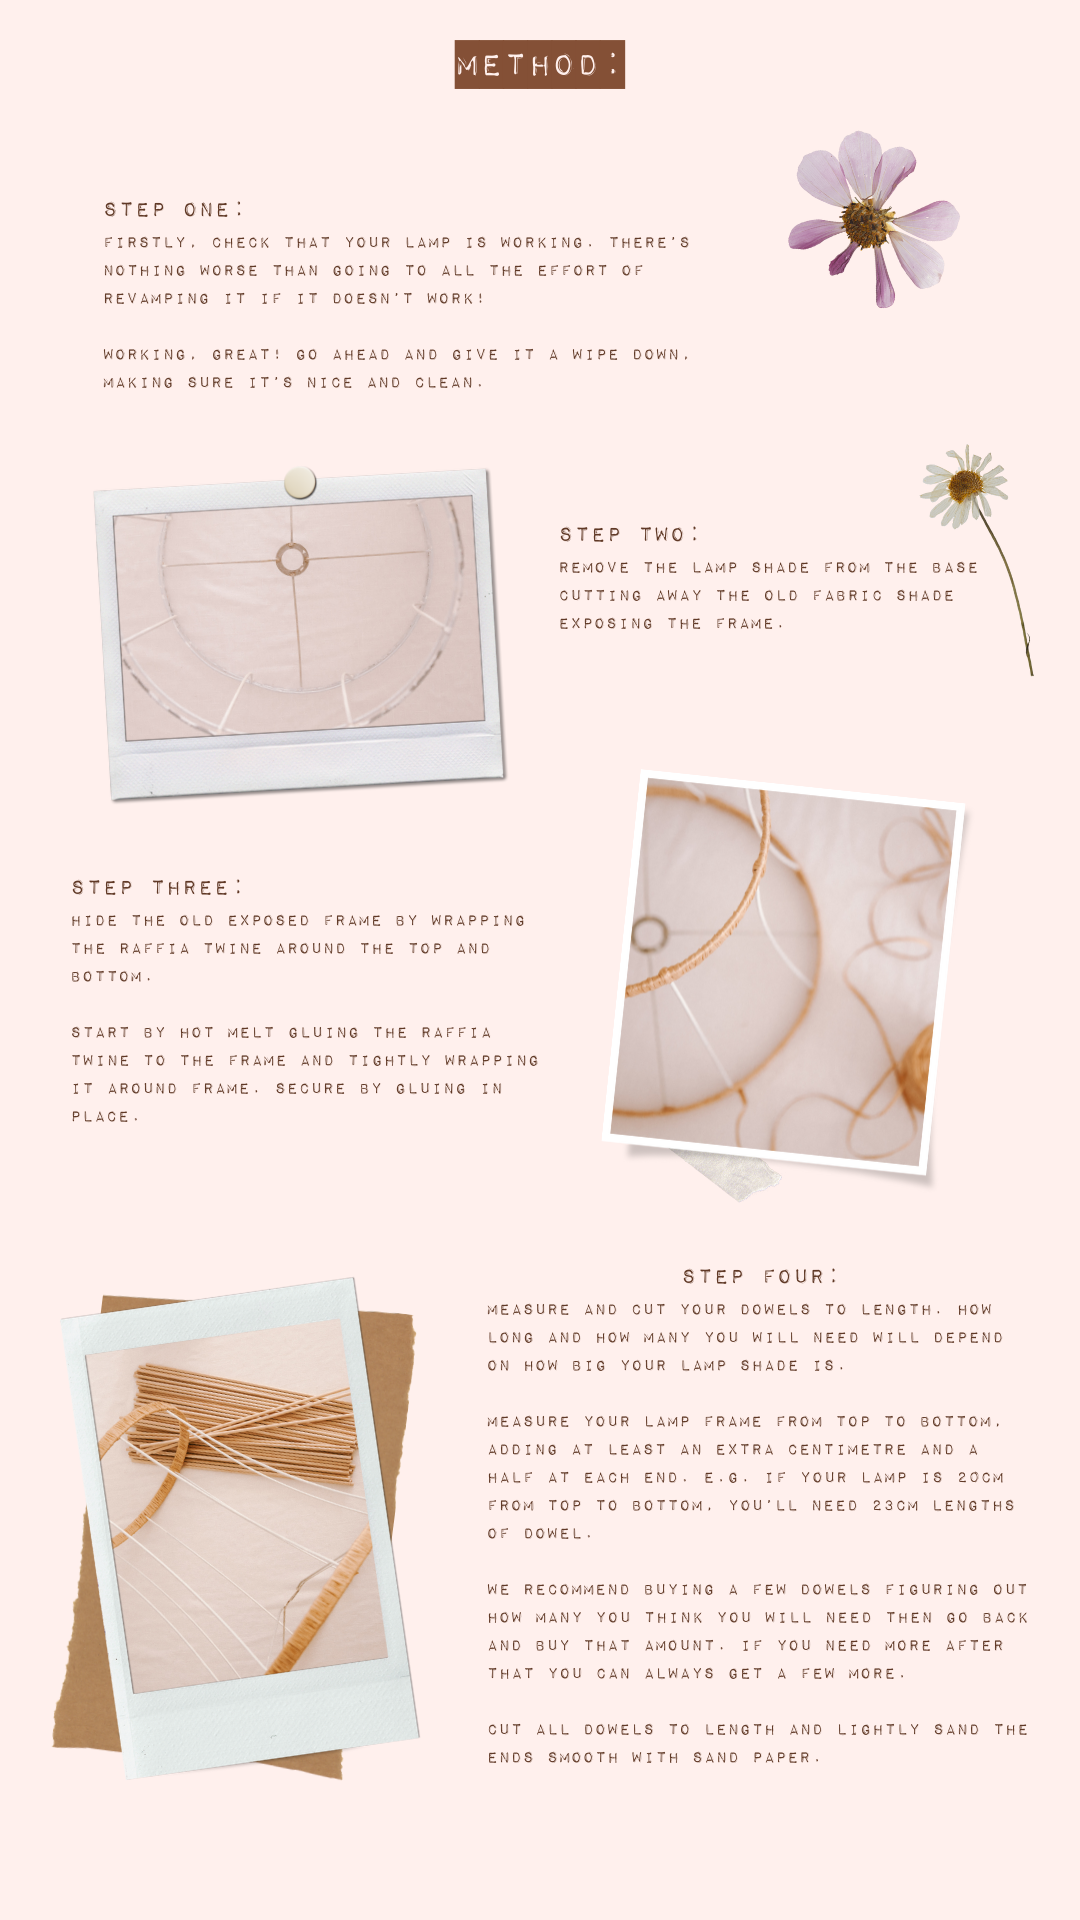
Step One: Firstly, check that your lamp is working. There’s nothing worse than going to all the effort of revamping it if it doesn’t work! Working, great! Go ahead and give it a wipe down, making sure it’s nice and clean.  Step Two:  Remove the lamp shade from the base cutting away the old fabric shade exposing the frame.  Step Three: Hide the old exposed frame by wrapping the raffia twine around the top and bottom. Start by hot melt gluing the raffia twine to the frame and tightly wrapping it around frame. Secure by gluing in place.  Step Four: Measure and cut your dowels to length. How long and how many you will need will depend on how big your lamp shade is. Measure your lamp frame from top to bottom, adding at least an extra centimetre and a half at each end. E.g. If your lamp is 20cm from top to bottom, you’ll need 23cm lengths of dowel. I recommend buying a few dowels figuring out how many you think you will need then go back and buy that amount. If you need more after that you can always get a few more.  Cut all dowels to length and lightly sand the ends smooth with sand paper.
Step 5:  Reattached the lamp frame to the base.  By securing the frame back onto the base it will make it much easier to work with. Using your hot melt glue gun, glue your first dowel at the top then bottom of your frame, checking that its straight. Glue your second dowel down leaving a gap between your first and second dowel. How big a gap you leave is up to you  and your preference (I left roughly 1cm between each dowel).  Step 6: Once you have glued all your dowels into place you can go ahead and weave the raffia twine around each length of dowel to finish it off.   Start by gluing the end of the raffia twine at the back of the frame. Loop over and cross the raffia over the left of the dowel.  Loop under coming up at the back on the right side of the dowel. Loop over the front and cross over the dowel to the right.  Loop under again coming up on the right side of the down. Loop around once keeping a firm pull on the twine. Repeat the process top and bottom until you’re back where you started. If you run out of Raffia twine at any time secure by gluing in the back, grab more twine and start from where you left off.   Step 7:  Remove lamp shade from base and put somewhere safe.   Step 8: Mix up the grout as per the packet instructions (do this outside with a mask on or in a well ventilated area….safety first). You’ll want the consistency to be like cake frosting or if you don’t bake like toothpaste! I would recommend mixing up a small amount of grout to begin with, as it will go off and begin to set. You’re better off using a small amount, then mixing more up when you run out.
Step 9: Using a spoon (or hands with gloves) paste grout onto base about 0.5-1cm thick. You’ll need to work in sections, I recommend starting at the top and working your way down.  Once you have covered a section you can stick your collected objects into the grout. Once completely covered allow 24 hours for the grout to harden.  Step 10: Grout all the way around the edge and under the base for extra strength. This will help prevent chipping and cracking when moving the lamp around.   Step 11: Mix up more grout adding more coverage to base where needed. I like to get up and around each shell and stone to make sure the are firmly secured.  If you notice any small cracks don’t panic, you can simply apply a little more grout over the top! Allow another 24 hours to harden.  Step 12.  Lightly sand over the entire base to give it a smooth stone like finish. Lightly dust off with dust brush  Step 13:  Reattach the lamp shade, add light bulb and light her up!!!!           We’d love to see your creations  #diywithfranki
With so many of us currently in lock down we’re spending more time than ever at home, transforming our homes into our sanctuaries. But how do we get those beautiful décor pieces we see on Pinterest to create our sanctuaries on a budget? A little glow up of course, and we’ve got a bright idea for you!
We are so excited to see your masterpieces! Tag us with #DIYWithFranki

Newer Post →